Briefly reviewing Harvin AR's internal workflow for Content Creation.
In previous videos, we briefly discussed Content Creation and the importance of developing unique, engaging, and meaningful content for deployment in both Augmented Reality and Virtual Reality.
In this video, I’d like to spend a little time covering the workflow we use internally within Harvin AR, and in later videos dive a little bit deeper into each individual step. So let’s get started!
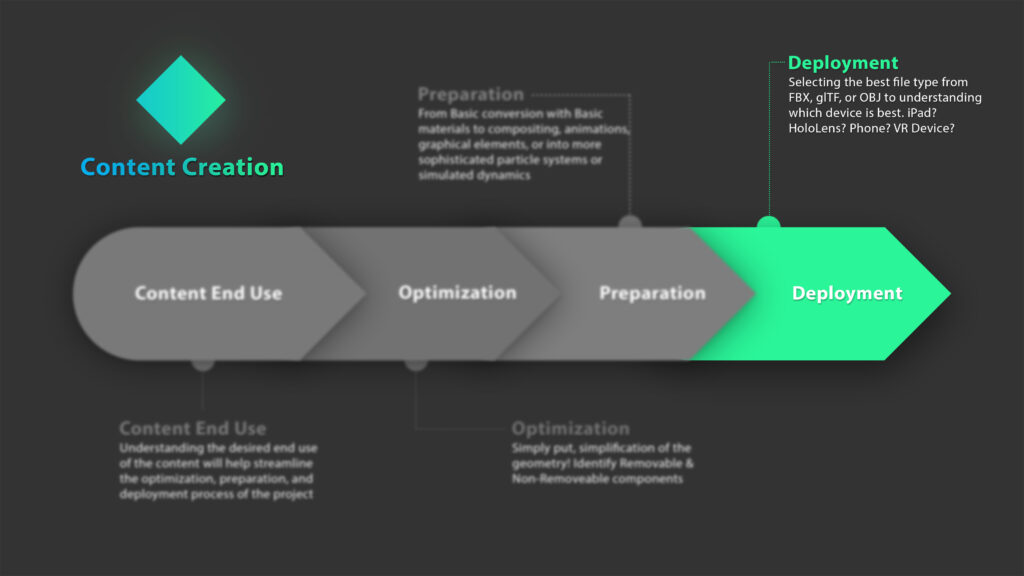
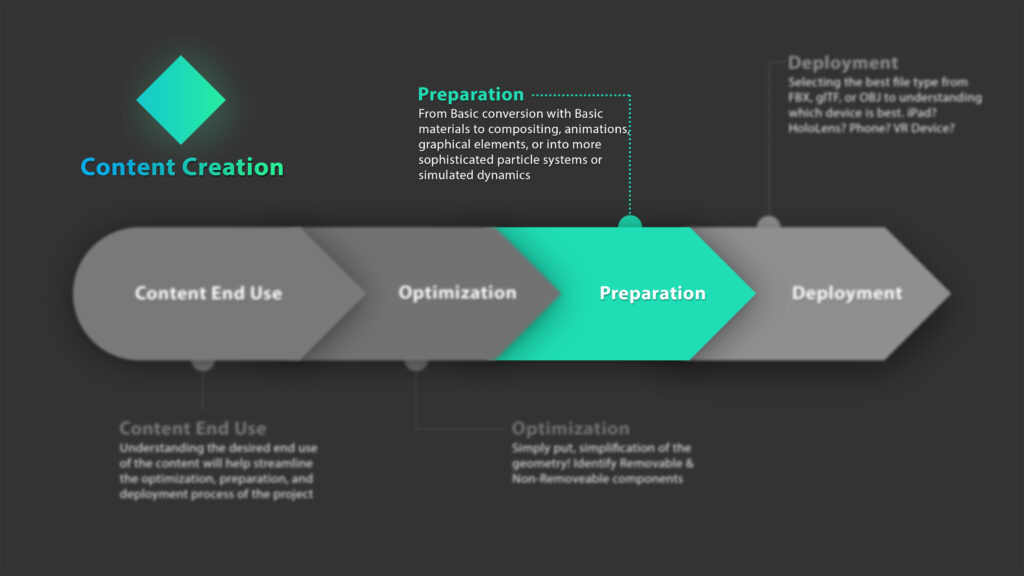
Ok! Here is the content creation workflow within Harvin AR.
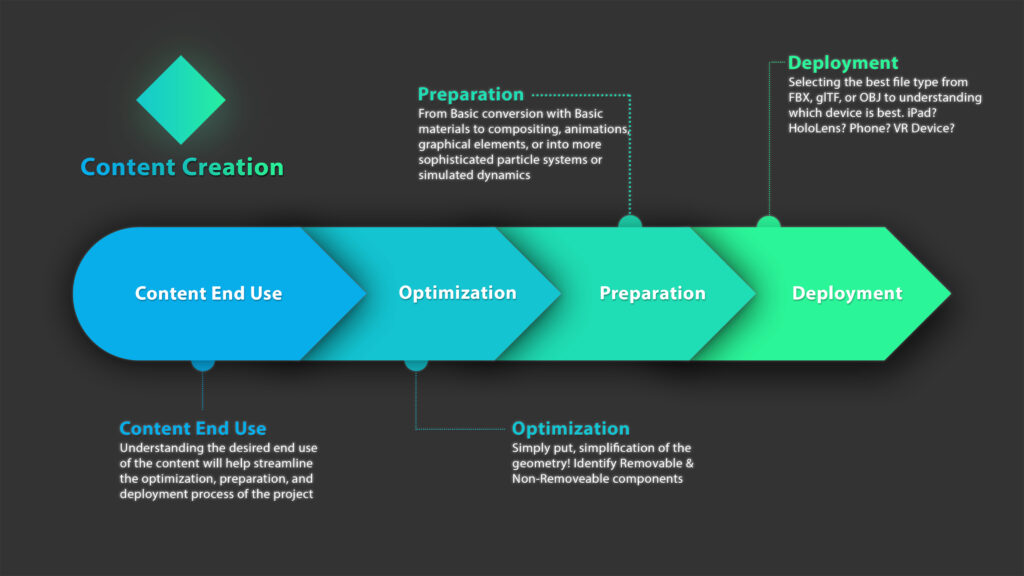
Now there are 4 Steps to this workflow;
– Content End Use
– Optimization
– Preparation
– Deployment
All of them very important but we are going to being with the most important of them all. Which is Content End Use.
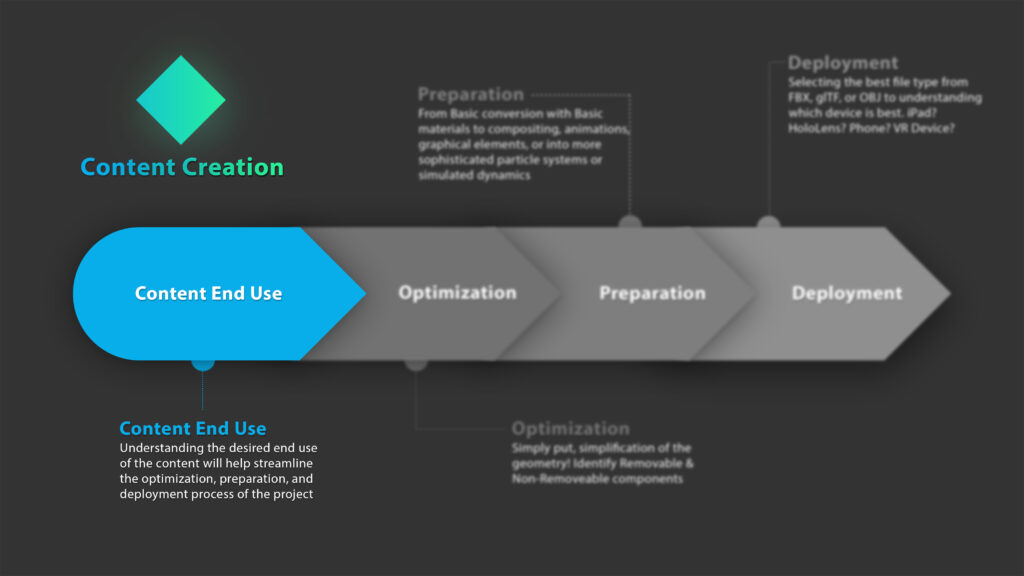
Before we begin to build any 3D content for Mixed Reality we really need to understand what the intended end use is. It’s imperative because it aids in the steps of Optimization, Preparation, and Deployment. Some examples of some end-uses for 3D Content could be anything from Trade Shows, could be plant assessments, maybe FATs, or maybe we are building some highly industry-specific 3D Models for Sales & Marketing. We could go even as far as the content we are building for Maintenance or Sanitation Training as well. I mean the list really goes on and on. So just be sure to spend time really thinking in this specific step.
Next up is Optimization!
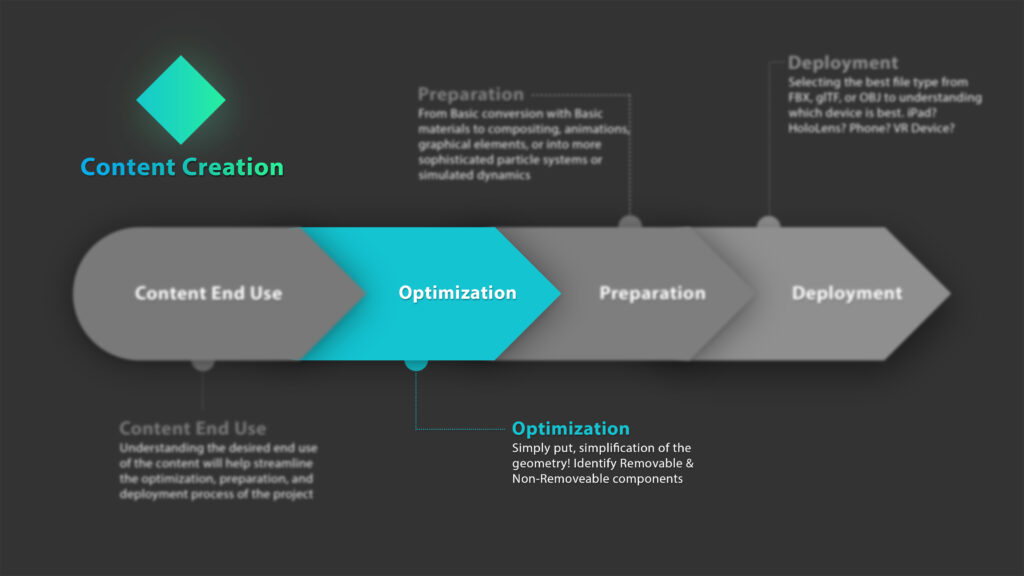
Now, this is simple in explanation and in practice actually, it’s pretty simple as well. I’d actually beg to say that a high percentage of engineers already have the skillset to do this right now.
Ok, there is certainly more to it but I’ll leave that to future videos to explain. Remember though, the hardware we use to display 3D Models such as Phones, Tablets, AR & VR Headsets, is only going to get more powerful. That means there is less time that needs to be spent on Optimization. Although it is still important. And there is other technology out there such as Remote Rendering can be a very valuable tool depending upon the end-use you have.
Alright, third step is Preparation.
Now this is where we get to be creative with those ideas for engaging, meaningful, and unique content.
Although I must say we don’t always have to be super creative. Sometimes basic materials with a basic model will be just as impactful.
Ok, we love using Blender 3D internally within Harvin AR, and even more so we love to educate our clients in how to use Blender within their business! But there are several other programs and tools that are just as powerful to create that amazing 3D Content.
When I am talking about amazing 3D Content I’m talking about animations, I’m talking about basic to near realistic materials, I’m talking about adding elements such as 3D Text, 3D Arrows, and all sorts of different things. I mean there’s really no limit to what we can create and this is the step where we really get to be creative!
Then we come to Deployment.